How to Install Railings – DIY Aluminum Railing Installation Guide, Measurements, and Instant Pricing
Introduction
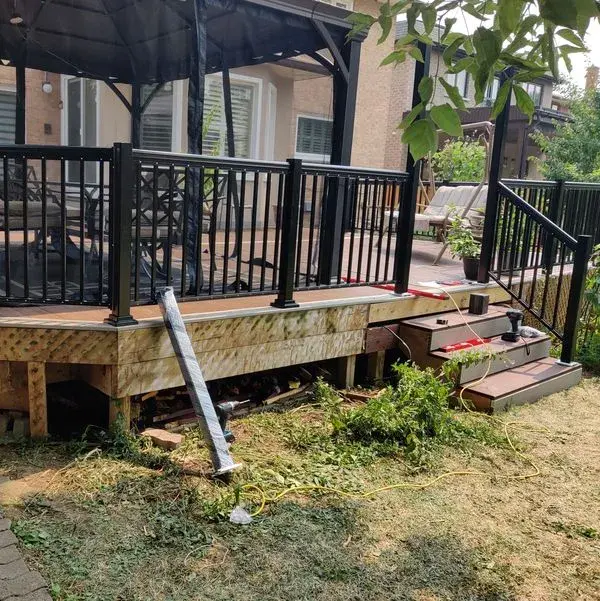
Thinking about installing railings yourself?
Good news: aluminum railings are strong, low-maintenance, and surprisingly easy to install — even for DIYers.
If the railing sections are manufactured to the correct dimensions, installation usually requires no cutting and only basic tools. Many homeowners choose the DIY option to save significantly on installation costs.
The most important step actually comes before installation begins: measuring your railing sections correctly.
On this page, you'll learn:
- - How to preview railing designs directly on your deck, porch, or stairs with our free 3D visualization and AR planning tool
- - What tools and materials you need
- - How to measure your space correctly so railing sections fit without cutting
- - How to install aluminum railings step-by-step
- - How to get a personalized quote and save with our DIY discount

Why DIY Railings Save Money
Professional railing installation often includes significant labor costs that can represent a large portion of the total project price.
Homeowners who install railings themselves can reduce the total project cost by ordering railing sections and completing the installation independently.
There are two main reasons DIY railing projects are more affordable:
- - No installation labor costs
When you install the railings yourself, you only pay for the materials — not for installation labor.
- - No wasted materials from cut-offs
Railing sections are manufactured to the exact dimensions between posts. Because each section is made to size, there is no need to cut rails during installation and no material wasted on leftover pieces.
- - Direct pricing without retail markups
Because the railing sections are manufactured to order, you can purchase them directly without the retail markup typically added to store-bought railing systems.
Using the AR planner helps ensure each section is calculated correctly so the railings can be manufactured precisely for your layout.
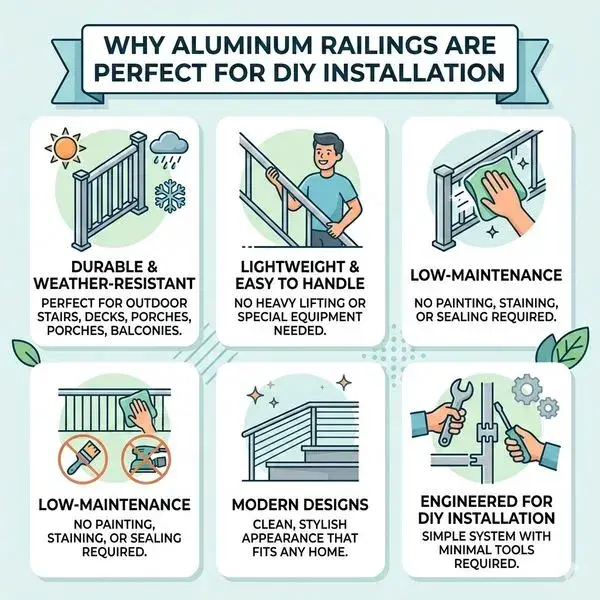
Why Aluminum Railings Are Perfect for DIY Installation
Aluminum railings are one of the easiest types of railings to install yourself. They are:
- - Durable and weather-resistant — perfect for outdoor stairs, decks, porches, and balconies.
- - Lightweight and easy to handle — no heavy lifting or special equipment needed.
- - Low-maintenance — no painting, staining, or sealing required.
- - Modern designs — clean, stylish appearance that fits any home.
- - Engineered for DIY installation — simple system with minimal tools required.
Is DIY Railing Installation Right for You?
Many homeowners successfully install aluminum railings themselves. DIY installation is usually a good option if you:
- - Are comfortable taking accurate measurements
- - Can use basic tools like a drill, level, and tape measure
- - Want to save significantly on professional installation
- - Prefer ordering railings made to exact sizes for easy assembly
Because our railing sections are manufactured to match your measurements, most DIY installations require no cutting or fabrication.
Once the railing layout is planned and sections are sized correctly, installation becomes a straightforward process of attaching posts and fastening railing panels.
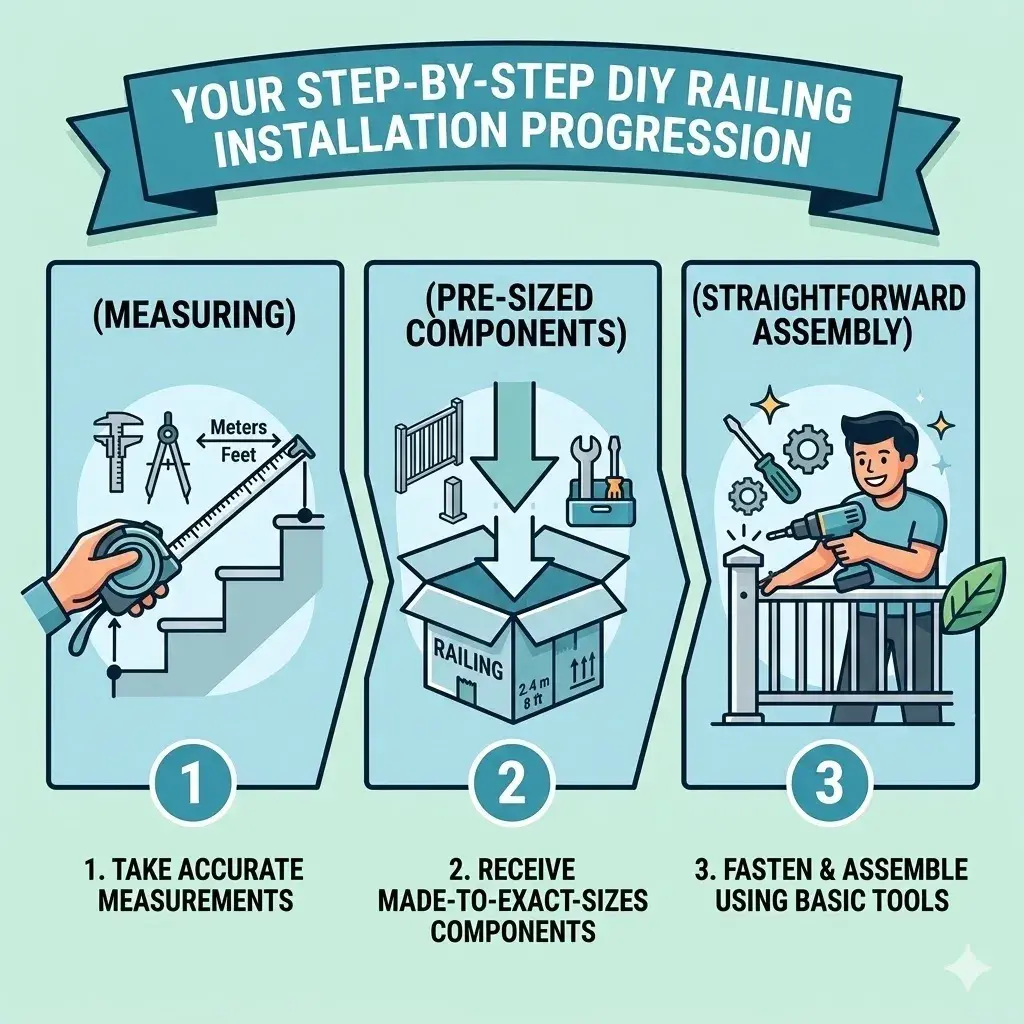
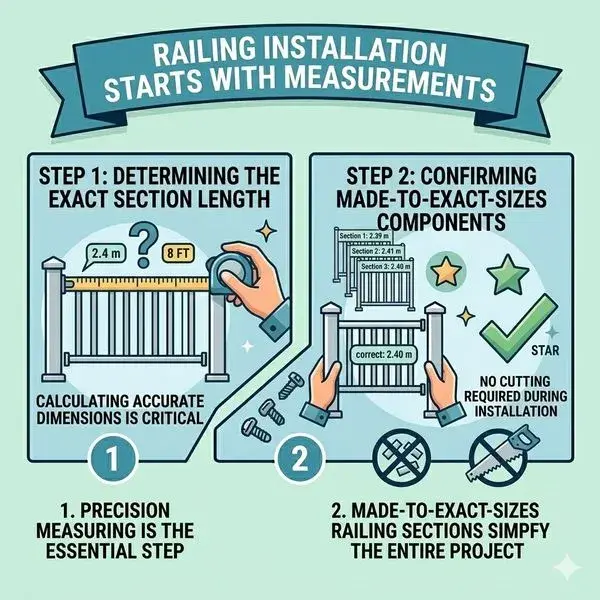
Railing Installation Starts With Measurements
Many people think installation begins with mounting posts or attaching railing sections. In reality, the first step in any railing project is determining the correct length of each railing section.
Each section must be manufactured according to the exact distance between posts.
When railing sections are made to the correct dimensions:
- - No cutting is required during installation
- - No material is wasted on cut-offs
- - Installation becomes much simpler and faster
For DIY installers, this is important because it allows the project to be completed using basic tools instead of specialized equipment.
To make this step easier, we created an Augmented Reality railing planner that helps homeowners plan their railings and calculate section sizes.
Plan Your Railings With the AR Tool
Instead of manually calculating every railing section, you can use our Augmented Reality tool to plan your railing layout directly on your deck, porch, or stairs.
Using your phone or tablet, you can:
- - Place virtual posts where real posts will be installed
- - Define start points, end points, and corners
- - Choose a railing design from the style library
- - See the railing in 3D at your deck, porch, or stairs
- - Automatically calculate the approximate section lengths
- - Get an instant price for your railings
Because the system calculates the section sizes automatically, it helps estimate the required railing sections and visualize the layout. Final measurements are confirmed before manufacturing to ensure accuracy.
No app needed. Just open the planner in Chrome on your Android phone or tablet.
Tools & Materials Needed to Install Railings
Here’s what you’ll need to install your aluminum railings:- - Tape measure
- - Drill with drill bits
- - Level
- - Mounting hardware (Some is included in the kit)
- - Safety glasses & gloves

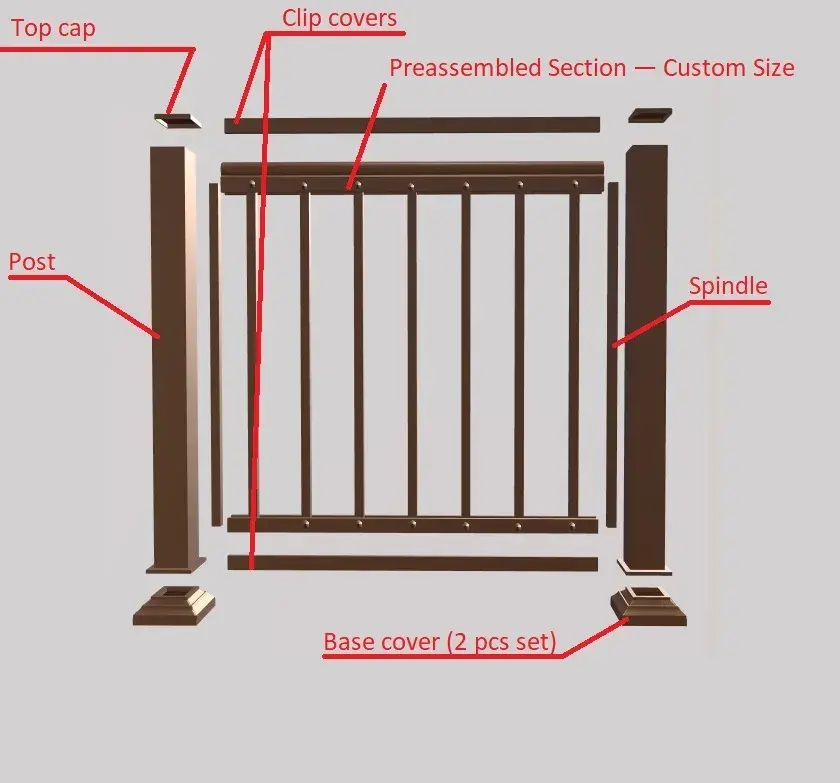
What’s Included in Your Railing Kit
Your aluminum railing kit comes with everything you need for assembly and installation:
- - Preassembled Section — Custom Size
- - Posts
- - Spindles
- - Mounting Hardware (except post-to-ground bolts)
- - Post Caps
- - Base Covers
- - Top and Bottom Clip Covers
Measurement & Preparation Tips for Railing Installation
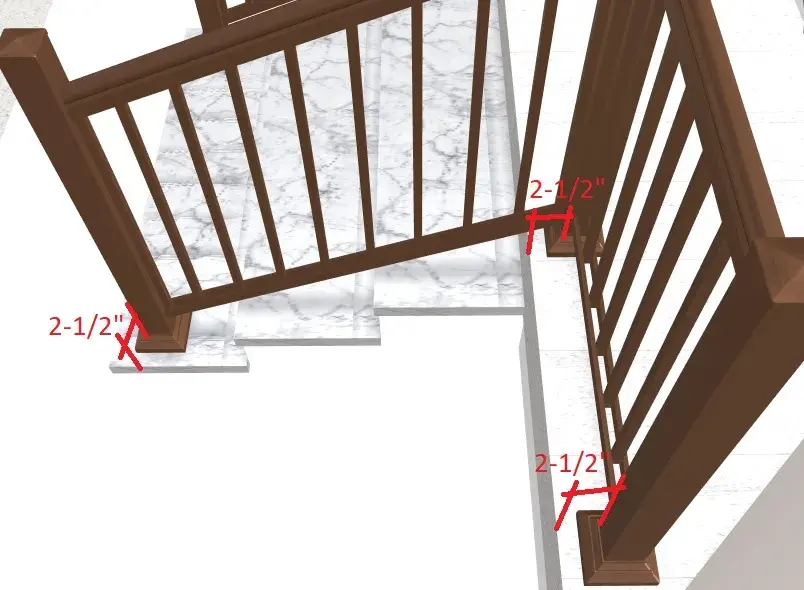
Correct measurements are crucial for a perfect fit. Here are some important tips to keep in mind:
- - The distance between the post and the edge is usually about 2-1/2”.
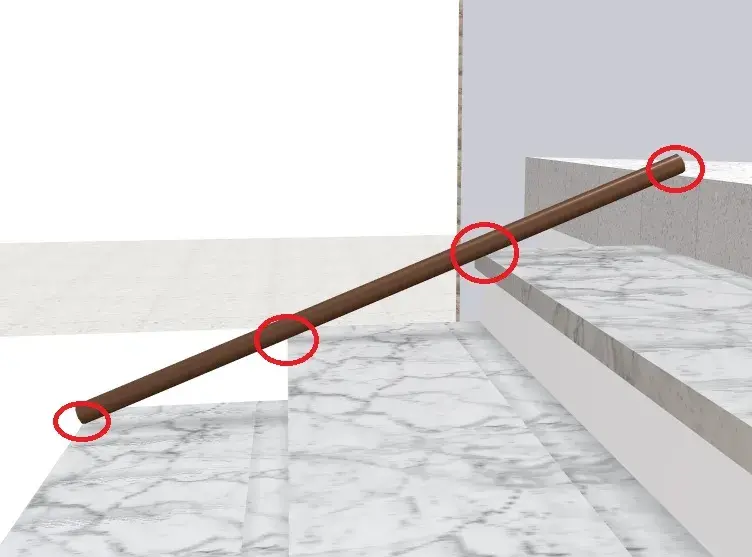
- - When measuring stairs, place a long level or straight board on the stair treads to see if all nosings touch or nearly touch the line. This ensures your stair railing will align properly.
- - If the top step nosing is lower than the alignment line across other nosings, your stair handrail may rise above the horizontal handrail or post. Make sure you’re satisfied with this result before ordering.
- - Always follow Ontario Building Code Requirements for height of handrail and bottom gap.
Step-by-Step Guide: How to Install Aluminum Railings
Step 1: Attach Spindle to Post
- - Use the screws provided in your kit.
- - For landings, spindles are usually installed 3” to 3 1/2” above ground level.
Step 2: Fit Panel Over Spindle
- - Slide the railing panel over the installed spindle.
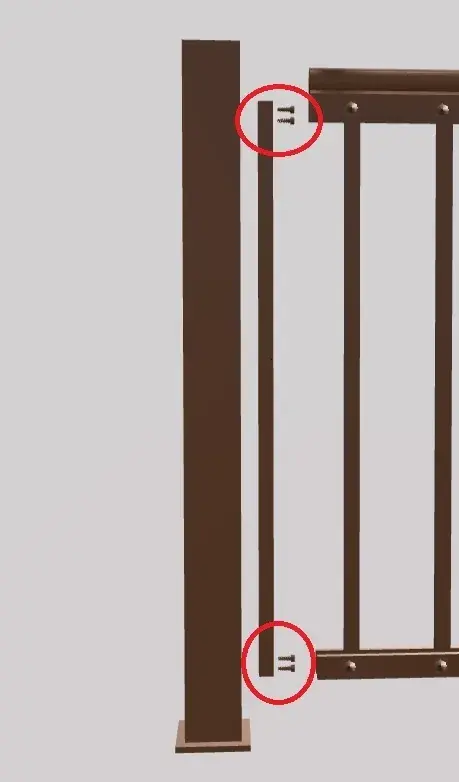
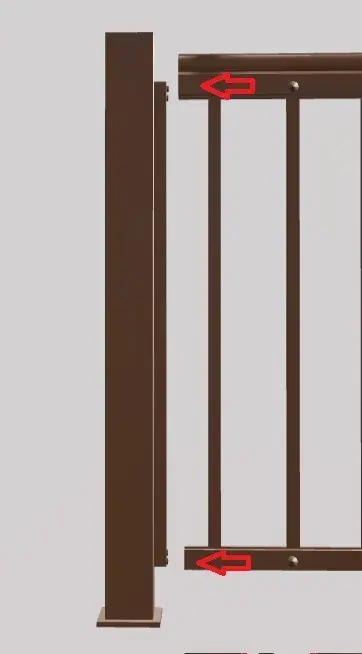
Step 3: Secure the Panel
- - Fasten with small screws on each side of the panel.
Step 4: Repeat for Additional Posts
- - Attach additional spindles and fit panels between posts.
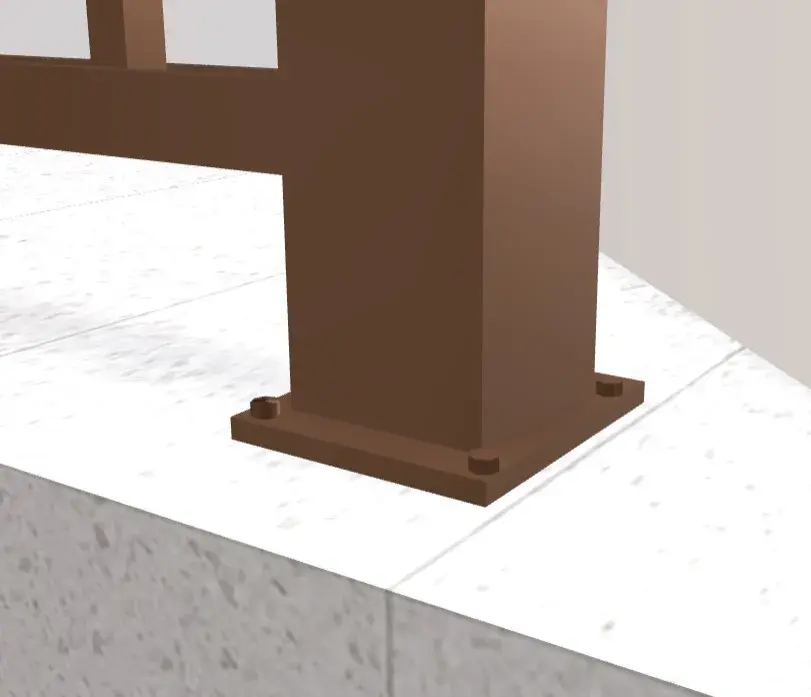
Step 5: Secure Posts to Surface
- - Predrill the holes to ensure clean, accurate installation.
- - Use appropriate hardware such as lag bolts or anchors to firmly attach posts to your deck, porch, or stairs.
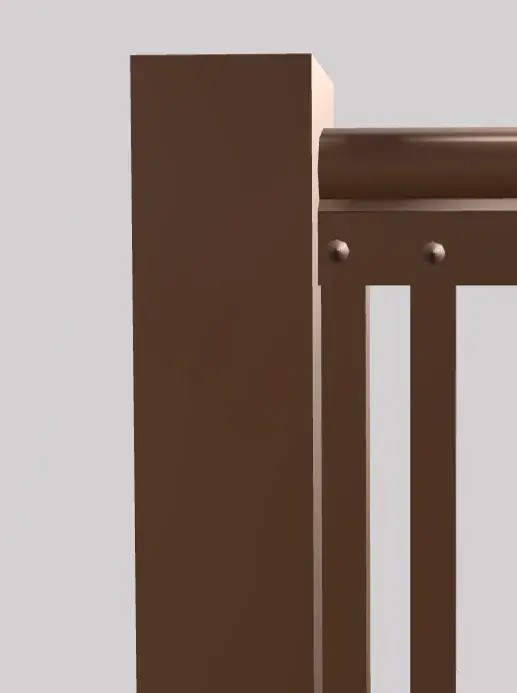
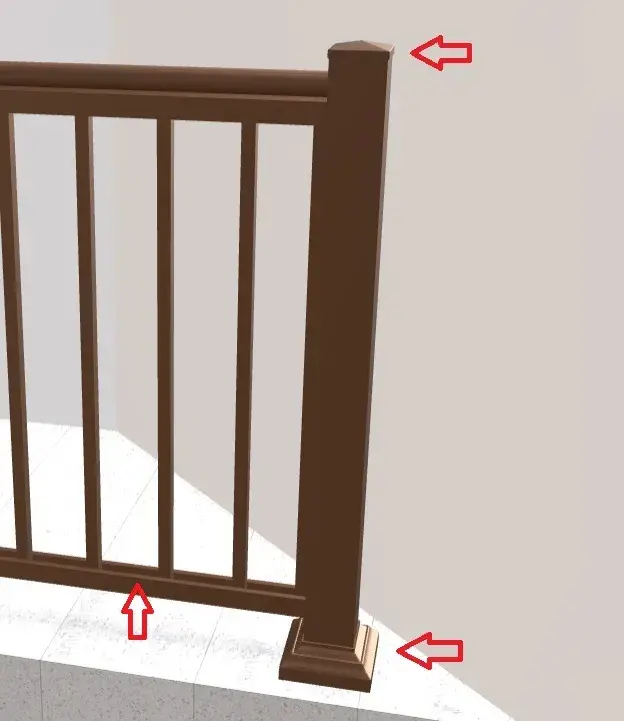
Step 6: Install Finishing Components
- - Attach top and bottom clip covers.
- - Install post top caps and base covers to complete the look.
That’s it! Your aluminum railings are installed — strong, safe, and beautiful.
Need help?
We offer expert support if you have any questions during measurements or installation.
Save Money with Our DIY Railing Discount
If you’re comfortable installing your aluminum railings yourself, we’ll reward you:
DIYers Get Special Pricing!
Take control of your project and save more — it's fast, easy, and accurate.
Get Expert Support When You Need It
Even though aluminum railing installation is DIY-friendly, you’re never alone.
We offer:
- - Email and phone support if you have questions
- - Free 3D design visualizations before you order